1. Ordering of tiles and edging
Measure the area to be tiled and calculate the square footage; one tile will be needed for each square foot. Figuring the square footage of different shapes:
- To figure the square footage of a square or rectangle, multiply the length by the width of the area.
- To figure the square footage of a right triangle (a triangle with a perfect 90 degree angle), multiply the two sides forming the right angle and divide by 2.
- To figure the square footage of an acute triangle (a triangle without a perfect 90 degree angle), multiply the full length of the base by the height (make an imaginary perpendicular line from the base to the angle) and divide by 2.
- To figure square footage of a curved section, create an imaginary line across the base of the curve and the top of the curve, which will allow you to create a rectangle around the curve. Figure the square footage for the rectangle; this will result in some leftover pieces, but these pieces can be cut to create the curve.
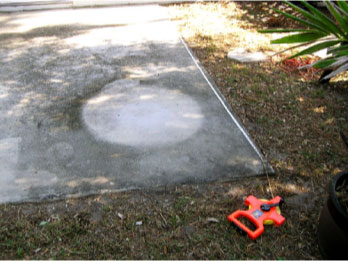
Measure the edges on which you wish to put edging. For the best look, we recommend putting edging on all sides of the tiled area. The edging pieces are each 3 feet in length.
When ordering tiles for a square or rectangle shaped area, ordering the exact number of tiles needed is appropriate. For curved or angled areas, ordering an extra 10% of the calculated area is recommended. Ordering an extra 10% of edging is also recommended. Exclusively with DIYPatioDeck.com, any unused additional full tiles or edging can be returned with no restock fee after installation for a full refund to ensure the full value of your dollar!
2. Installation Step 1: Placement of the cornerstone tile
Place the first tile by starting in the most visible corner of the area. For example, if the far left corner of the patio or deck points towards the majority of the back yard, start there. Place the tile with room for edging (if using edging) by laying two edging pieces alongside the tiles; this will ensure there is the appropriate space for later mounting of edging. Make sure that the tile is placed with the male triangle shaped connectors facing out away from the corner so the next tiles in both directions snap down onto the previous tile, instead of under it.
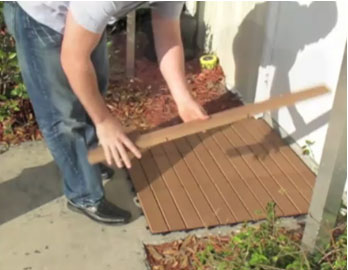
3. Installation Step 2: Laying tiles
Snap all the tiles down. The male triangles fit into female triangle shaped groves on the bottom of the next tile.
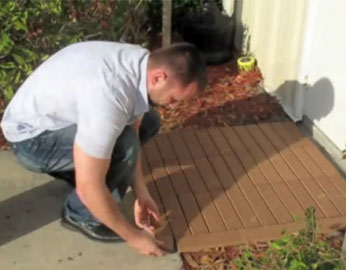
4. Installation Step 3 (If applicable): Cutting tiles to fit obstacles or unique size deck
Measure the space and shape you need to cover with the tile and draw the appropriate shape on the tile from the measurements. Flip the tile over and, for your safety, remove any screws that may be in the path of the saw. Using a circular saw or handsaw for straight cuts or a jigsaw for curved cuts, trim away the section of the tile to fit the obstacle.
5. Installation Step 4: Edging with Deck 'n Go Edge-Perfect
The edging will be applied with the same technology as the tiles. It will have molded male or female pieces that simply snap into place along the edge of the tiles
You can simply start with the cornerstone tile; starting with the most visible corner will allow any smaller, cut piece of edging to be placed in the less visible areas. If using a wood grade Edge-Perfect product use an outdoor clear sealant will not be necessary
The Edge-Perfect edging will not run past the corners of the tiles, they will be set flush with the tile's edge. When edging is completely installed we supply corner tiles that will snap into place also using the same male/female technology as the deck tiles and the Edge-Perfect edging
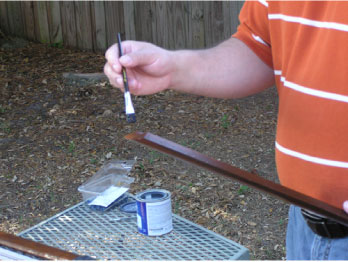
5. Installation Step 4 a: Edging with Contractor Edge-Perfect
Start with the cornerstone tile; starting with the most visible corner will allow any smaller, cut piece of edging to be placed in the less visible areas. Using a miter saw, cut the edging at 45 degrees angles that complement each other to match up on the corner. Coat the cut part with an outdoor clear sealant.
Continue along the edge of the tile with full pieces of edging and cut when needed for shorter pieces or corners. Be sure to lay out all the edging pieces and cut as needed before drilling the holes for installation.
The edging can be used overlapping male triangle connectors, or without any connectors. There is no top or bottom for the edging; it is symmetrical. Simply put one of the flat surfaces against the ground and the other flat surface against the side of the tiles.
For installation on cement: Secure to the foundation using concrete screws (Tapcon blue screws in most hardware stores). Any size screw you prefer can be used, but our recommendation is Philips head 3/16" x 2-3/4" for a good hold that will withstand repeated foot traffic.
Using a drill bit size recommended by the screw manufacturer (e.g., with the Tapcon 3/16", they recommend a 5/32" bit), pre-drill the edging downward all the way through in two places with the same size wood bit. Make sure the holes are evenly spaced from each other and the ends of the edging for aesthetics.
After pre-drilling the edging, lay the edging in the correct place against the side of the tiles. Using a rotary hammer drill and an appropriately sized masonry drill bit, drill through the two holes in the edging into the concrete. Be sure to secure the edging while drilling into the concrete, such as by putting your foot on the edging with pressure against the tile so it remains in the correct position. Immediately after drilling the hole in the concrete, insert the concrete screw and secure the edging piece. Use an appropriate counter sink bit so the head of the screw does not stick up out of the edging.
For aesthetic appeal, either purchase wood plugs from a local hardware store for the counter sunk heads, or paint the top of the screw with a brown outdoor paint.
For installation on wood: Use screws or outdoor nails. If you are using screws, follow the steps above for pre-drilling the edging for the screw and countersinking the screw head. Then screw the edging to the deck using deck screws. If you are using nails, hammer the nail through the edging into the deck in 3 to 4 locations evenly spaced.
When laying the edging don't leave a gap between pieces; one of the advantages of our Edge-Perfect system is the continuous and unbroken look the edge pieces will give your deck for a truly finished appearance.